Map Domain name bought from BigRock with Blogger. In my previous post few months before i have written a tutorial how to map Dot Tk domain in bloggers .So this time i am going to write how to map a domain name bought from BigRock in bloogers. Whats Domain name? Domain Name is an unique address of a website that is use open that particular website. So here are the steps to map domain mane bought from BigRock with your blogger blog.
- First requirement is a blog that you want to map with custom domain.
- Second a Top Level Domain name (.com, in, .co, .info, .org, .co.in,etc..) according to your need, choice and availability.
So if you have not already bought a domain name visit Bigrock.com there type a name that you consider to be your's blog name then select domain type from drop down menu and click on go it will take you to next page where it shows whether the domain name is available or not if available select the period of time you want to book it for say 1 year or more up to you. Now scroll down and click on continue In the next page you can use this coupon code "rootingpalace.com" and will get discount ( Domains / Digi Cert / BIFM : 10% and Web Hosting / Email Hosting / DIY : 15% ) Now log-in or create account to log-in and make payment according to method of your choice.
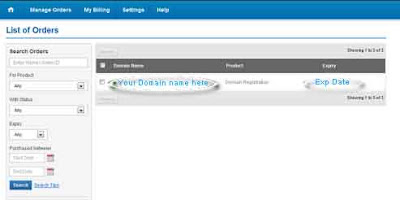
Now login to your bigrock account, it will show the domain that you have already bought as shown in the pic below. This shows you the details of the product that u bought from them in your case the domain name. Click on the domain name you will be taken to next page.
When you click on your domain name it will open a new window showing detailed informations about the domain name that you have bought. Now look on the right sidebar and select "DNS Management" as shown in picture below
Now on the left hand side under DNS Management click on "Manage DNS" a new pop up window will appear showing many tabes A Records, AAAA Records, MX Records, CNAME, etc. Dont worry for configuring our domain name with blogger only two of them are required A Records and CNAME Records. So no need to get into deep for it.
Select A Records tab and click on "Add A Record" a window appears fill the details as shown below
Host Name: Leave this field blank(As because it is for your primary domain)
Destination IP Address : 216.239.32.21
Leave rest of the things as it is and click on Add Record
After that add three more A Records with the IP Address that are listed below
216.239.34.21
216.239.36.21
216.239.38.21
On the completion of adding all the four A Records, from the main tab click on CNAME Records and click on Add CNAME Record and enter the details listed below
Host Name : www.
value : ghs.google.com
and Click on Add Record
Congratulations all the required step completed. Now the final step adding the custom domain in blogger to achieve top level domain for the blog. Now go to blogger.com in the dashboard click on settings of the blog to which you want to add the custom domain after that click on publishing and then on link saying switch to Custom domain.
You will be taken to next page there click on link saying Already own a domain? Switch to advanced settings
Enter your custom domain that you bought and configured in the steps above under your domain with www. and Save
All the steps are completed Congratulations Now your blog is on top level domain
Wait for few hours in some case it may take upto maximum 24 hours to process and become live.


0 comments :
Post a Comment