Wednesday, August 1, 2012

BUSYBOX PRO V8.8

The fastest, most trusted, and most popular BusyBox installer and uninstaller! Over 2 million installs! Winner of best Utility Software award for Android via Handster. This is the ONLY Installer on the market that will allow you to remove Busybox (If supported on your phone) AND the only open sourced installer!
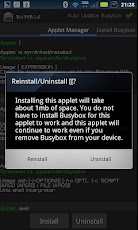

Source: https://code.google.com/p/busybox-android/
Featured on the BusyBox website at: http://busybox.net/products.html
The BusyBox source code can be found here: http://git.busybox.net/busybox/
A must have for any rooted phone! Almost EVERY rooted applications needs BusyBox to perform their magic, if you have a rooted phone then you need BusyBox.
Pro version contains no ads or nag screens, uninstall feature, custom tune feature, the ability to hand pick the applets you want, safety check for missing applets on start, and better overall support. The pro version will receive more frequent updates than the free version will.
This installer has the smallest Busybox binaries available, right around 700kb unlike the other installers which are over a meg. Also this installer does not require you to download anything extra like other installers do and thus works much faster.
Please note I did not write BusyBox! I wrote this installer, cross compiled BusyBox for Android. Please see the about menu option for more details or here:http://www.BusyBox.net
BusyBox is a software application that provides many standard Unix tools, much like the larger (but more capable) GNU Core Utilities. BusyBox is designed to be a small executable for use with the Linux kernel, which makes it ideal for use with embedded devices. It has been self-dubbed “The Swiss Army Knife of Embedded Linux”.

This version includes 1.19.4, 1.19.3, 1.19.2, 1.18.4, and 1.18.5 no need to have more than that because it takes up space on your phone and each newer version will still contain the older features, unless I forgot to compile them in.
Leave this installed if you always want to get the latest version of busybox!
tags: busybox, utility, terminal, emulator, root, stericson, adb, toolbox, rom, unlock, jailbreak, root, linux, unix, shell, script, tools, android, installer, busybox installer, (Confirmed Amazon)
What’s in this version:


V8.7

Improved Smart Install.
Added BusyBox V1.20.2

v8.6
Fixed a bug with smart install.

V8.5
improved speed on Smart install.
Improved the looks of the application.
Added the ability to choose between smart install or regular install.
Added backup feature!
Free BusyBox Pro v8.8 apk

Read More

SMS LOCKER V1.0

THIS APPLICATION SECURES ALL INCOMING MESSAGES, AND ALSO OFFERS YOU AN OPTION TO REPLY TO THESE MESSAGES, AND ALSO THE OPTION TO SEND OTHER MESSAGES, WHICH ARE ALSO SECURE. THE APPLICATION HAS A PASSWORD, SO ACCESS TO THESE MESSAGES IS PROTECTED. MESSAGES ARE STORED IN AN ENCRYPTED DATABASE, SO IT CAN BE SAID THAT THE APPLICATION IS COMPLETELY SECURED.

SMS LOCKER IS VERY SECURE AS IT CAN BE SEEN THE PHOTO GALLERY OF PEOPLE WHO WANTED TO ENTER THE APPLICATION USING THE WRONG PASSWORD.
IT CAN BE CHANGED THE ALERT SOUND WHEN ENTERING AN INCORRECT PASSWORD, AND ALSO CHANGED THE SOUND WHEN YOU RECEIVE A NEW SMS.
WITH THIS APPLICATION WE CAN CREATE ANOTHER PROFILE THAT IS FAKE, THAT IS A WAY TO HIDE PERSONAL MESSAGES.
YOU CAN CHANGE THE PASSWORDS BOTH OF THE BASIC PROFILE AND OF THE FAKE PROFILE.
WITH SMS LOCKER YOU CAN SEND MESSAGES AND THE RECEIVER CAN SEE THE LOCATION USING GPS (GLOBAL POSITIONING SYSTEM).
NOTE:
THIS APPLICATION IS ONLY SUPPORTED BY THE DEVICES USING ANDROID 2.3.3 AND ABOVE,AND NOT FOR LOWER VERSION. 
use at your own risk.


Read More
Mobile ODIN is the on-device firmware flasher of choice. Just throw those firmware files on your (internal or external) SD card, start Mobile ODIN and flash away.!!! Your device must be rooted to be able to use Mobile ODIN. Check the list below to see if your device is supported !!! If you use the EverRoot option, Mobile ODIN will root the firmware while you flash it. Checking out that new leaked firmware? No reason to lose root!

Currently supported devices:
Samsung Galaxy S GT-I9000
Samsung Galaxy S GT-I9000B
Samsung Galaxy S GT-I9000M
Samsung Galaxy S GT-I9003
Rogers Captivate SGH-I896
AT&T Captivate SGH-I897
Samsung Galaxy Tab 7" GT-P1000
Samsung Galaxy S2 GT-I9100
Samsung Galaxy S2 GT-I9100T
AT&T Galaxy S2 SGH-I777
Sprint Epic 4G Touch SPH-D710
Samsung Galaxy Note GT-N7000

New in v2.00:
Samsung Galaxy S2 SHW-M250S
Samsung Galaxy Note GT-I9220
Samsung/Google Galaxy Nexus (GSM) Maguro/Yakju/GT-I9250
Samsung/Google Galaxy Nexus (CDMA/LTE) Toro/Mysid/SCH-I515 (no cdma radio flashing)
Samsung Galaxy Tab 7.7" GT-P6800
Samsung Galaxy Tab 7.7" Wi-Fi GT-P6810
Samsung Galaxy 5 GT-I5500
Samsung Galaxy 5 GT-I5500B
Samsung Galaxy 5 GT-I5500L
Samsung Galaxy 5 GT-I5500T
Samsung Galaxy 5 GT-I5500M
Samsung Galaxy 5 GT-I5503
Samsung Galaxy 5 GT-I5503T
Samsung Galaxy 5 GT-I5508

New in v2.10:
Samsung Galaxy Tab 7.0 Plus GT-P6200
Samsung Galaxy Tab 7.0 Plus Wi-Fi GT-P6210
More devices to come!

Flashing with Mobile ODIN does NOT increase your custom kernel flash counter or make the yellow warning triangle appear.For discussion, check out the forum thread 

MANUAL
Flashing with Mobile ODIN is easy. You start off by starting the app. The app will check yoursystem has everything the app needs to continue (like root). It may need to download an additional package, so it is advised you have Wi-Fi available.
Now you should see the main Mobile ODIN screen. It will list a set of partitions. Clicking a partitionwill allow you to select a file from your SD card to flash to that partition. Do not worry about selecting the wrong file – Mobile ODIN will not let you. Separate files (named after the partition) as well as .tar and .tar.md5 files are supported.
From the desktop ODIN you may be used to "PDA", "PHONE", and "CSC" buttons. All three of these buttons have been replaced by the "Open file …" button. This button will open the file youselect from the SD card, and find all the partitions it can flash inside that file. So if you select a .tar file containing kernel and modem, the Kernel and Modem partitions will be set up to use that .tar file for flashing.
Now that we have selected what we want to flash, if you have the Pro version you can proceed to the EverRoot section. The EverRoot options allows you to root your firmware while it is being flashed. Never again will you be without root! Select here which apps you want to inject in thefirmware that is being flashed.
Now that we are all done selecting partitions and configuring EverRoot, we continue to "Flashfirmware". Mobile ODIN will gather all the information it needs and perform the flash. Before starting, however, it will check that your battery level is over 50%, and if applicable offer to verify MD5 checksums on the files you have selected to flash. If all is well, it will reboot into recovery mode, and flash the firmware you have selected.

What’s in this version:

Updated: SuperSU v0.93
Fixed: Wipe data/cache issue
Added: Unreadable fiel warning
Added: Support for:
Samsung Galaxy S3 GT-I9300T
Samsung Galaxy S3 GT-I9308
AT&T Galaxy S3 SGH-I747
Canadia Galaxy S3 SGH-I747M
TMOUS Galaxy S3 SGH-I999
Sprint Galaxy S3 SPH-L710
Samsung Galaxy Tab 10.1" GT-P7500/P7510
Samsung Galaxy Tab 2 7" GT-P3100/P3110/P3113
Samsung Galaxy Tab 2 10" GT-P5100/P5110/P5113

Download Link

Read More

Sunday, July 29, 2012

Get new Jelly Bean wallpaper on your devices! Runing on android 2.1+.Download the free Jelly Bean (JB) live wallpaper featuring floating particles. You can also change different type of particles in settings screen.
Now with 5 floating particle types: Capsule, Bean, Beam, Droid and Star! For jelly bean Rom click here


To use: Home -> Menu -> Wallpapers -> Live Wallpapers

This live wallpaper has been tested on latest devices such as Samsung Galaxy S3 and Galaxy Nexus.
Note: If your wallpaper resets to default after reboot, you will need put the app on phone instead of SD card.

Screen shot:


Download link

Read More

Saturday, July 28, 2012


Normally phone internal memory is normally not enough to install all the required applications of our choice, thus it becomes very difficult to manage all the applications and use them accordingly. The Android version 2.2 allows us to move applications to SD card so that we can install applications on the SD card and thus use all the required applications as and when wanted. The application namely MoveToSD will help with the problem as easily as putting a dot. This application is very easy to use as it has a very simplistic UI which helps in easy application management.
MoveToSD
MoveToSD is just the right application for those who want to manage applications, thus applications can be moved from internal phone memory to SD card and can also be moved from SD to internal phone memory as per requirement. The very simple UI makes the job easier as we can very easily reach the columns, here there are two columns, one for applications installed on SD card and another for applications installed on phone memory. Along with that the application also displays the amount of memory left free in phone memory and amount of memory left free on the SD card, thus we are very much aware of the memory that will be used up and the memory that will be left free on the SD card as well as phone memory.
MoveToSD can also perform normal operations like force stop, uninstall, clear data and clear cache. The only setback for this application is that only one application can be moved to SD at a given time, thus batch operations are not possible. If the application is used in order to save phone memory then batch operations are really not required. For example, if an application is frequently used then that particular application can be left in the phone memory and games which take up most of the space can be moved to SD card in order save phone memory. Application is only supported on Android devices with version 2.2 and above.
DOWNLOAD:
Using QR code:
Use the QR code below. To scan the QR code use Neo Reader or any other bar code scanning program. Neo Reader can be downloaded from the market or follow the link http://get.neoreader.com/
QR for MoveToSD

Read More

Friday, July 27, 2012

Tutorial to root and unroot samsung galaxy y duos S6102. This tutorial is for the user who have to root samsung galaxy y duos s6102 and not for samsung galaxy y s5360 if you want to root galaxy y s5360 then click here for tutorial. Thanks to Millan.SIS at xda for creating this package here i am only providing tutorial on how to use it. Get custom Rom for galaxy y duos


Warning: Rooting will void warranty of your phone use at your own risk.

Steps to Root Galaxy Y Duos S6102

  • Must backup your data first
  • Download the Rooting File from Here (update.zip) also availavle on xda
  • Copy update.zip file to the SD Card root directory
  • Turn Off your Device and boot in recovery mode by pressing the key Volume Up + Home Button + Power Button together. 
  • when your phone boots in recovery mode will see the Blue Color UI where you can't use Touchscreen. Instead use "Volume Up and Volume Down to move Up and Down". And "Home Button to Select". And "Power Button used to go Back"
  • Then select "Apply Update from SDCard" option and choose "update.zip". from sd card
  • Once Patching is completed successfully reboot your Phone by select "Reboot System Now".
  • If you find "SuperUser" in your app menu your phone successfully Rooted 

Steps to UnRoot Samsung Galaxy Y Duos s6102


If you want to unroot your phone then
Backup your data
Download the UnRooting File from here (unroot.zip)
Follow rest of the steps as above in root section
If you cant find "SuperUser" in your app menu your phone successfully UnRooted.
Read More

Saturday, July 7, 2012

As many of my visitors requested me how to restore back to stock Rom So here is a simple way to get back to stock rom for galaxy y using ClockworkMod. When flashing rom with this method you don't need an Odin and Computer. It is very useful for those who always use to updated their phone with new versions of Custom Rom.

Warnings:
Charge your's phone battery full before applying this instruction
Use this at your own risk we will not be held responsible for what ever happens to your phone using this guide.


Requirements:
Stock ROM file (ClockworkMod.zip) (124.82 MB) 


Flashing Instructions: 
  • Download the zip file from the link above to root directory of sd card and extract it using zipper. On extraction you will get one folder and two files.
  • Now open the folder it name will be "backup", Inside the backup folder you will get " DDLE1" Folder this folder con taints Nandroid.rsf.tar, System.rfs.tar, Cache.rfs.tar 
  • Now reebot your phone in ClockworkMod Recovery and Wipe data and cache partition. 
  • Now from the menu select "Backup and restore". And select Restore (not advanced restore) 
  • Then Select the folder DDLE1 and after that confirm-restore DDLE1. 
  • Flashing will start do not intterupt the process it may take up to 10 minutes
  • When you receive the message Restore complete,reboot your device. 
  • Phone will restart.

YOU ARE BACK ON STOCK ROM.
Read More

Wednesday, June 20, 2012

Google Adsense is not only a way to monetize blog or site there are other alternatives
Few best alternatives to Google AdSense to earn money for your content on blog or site. Google Adsense is not only a way to monetize blog or site there are other alternatives. As a blogger or website owner you know that Google AdSense is #1 contextual advertising network. There are lots of bloggers who are making hundreds of dollars from from Google but not all because as a new blogger or site owner may neglect some AdSense ToS unknowingly and then it will become very difficult for them to get approved from Google AdSense and even after getting approval if Adsense ToS are neglect will get banned by Google from the Adsense. So what to do if don't have an approved AdSense account or get banned for neglecting Tos of Google AdSense. Now the question arises how to monetize the blog the best answer is to look for Adsense alternatives.

So here i am going to list few adsense alternatives which you can use to monetize your blog (based on my own experience and a few points from other)

chitika is one of the most popular advertisement network and a nice alternative to adsense offer text, map, mobile ads in different size according to need of you space available Payment: Minimum payout of $10 is offers through PayPal and for Check $50.
Adbrite: 
Adbrite Adsense alternatives
Adbrite is one of the most popular advertisement network can be considered as the best alternative to Google AdSense. Adbrite have three different types of provision for displaying ads on your site Banner and or Text Ads, Full page ads and Inline ads some are CPM and some are CPC. The terms and conditions of Adbrite are much more relaxed but presently they are not accepting blog or site if it is hosted on free web hosting service or if not on top level Domain etc. payments are made through check.

BidVertiser:

Bidvertiser is also a good alternative to Adsense Bidvertiser have Different types of ads formate you can use there Banner and or text ads in your blog or website they have XML Feed and Mobile Banner ads for mobile version of your blog or site . Bidvertiser allow you to manage the and placement & style of ads with greater versatility Best for high traffic blogs. Payment: Minimum payout of $10 is offers through PayPal and Skrill/MoneyBookers, for Check $100 Minimum and for Wire $500 is Minimum.

Infolinks:
Adsense alternatives infolinks
Infolinks are specialized in In-Text advertising their ads are shown on your page along with words based on the keywords and phrases on your page which does not contain any link are converted to advertising links.Different ads type they have are In-Text, Related Tags, Tage Cloud and Search Widgets Their ads are Pay per Click Best thing is that you can use infolink ads with other advertising program.Payment: They pay you either by Wire transfer($400 min), echeck, payoneer or paypal ($50 min).

cpm.biz

Well this is just new and and i have just now registered it looks good lets see i will discuss about it latter.Payment: They pay you either by Alertpay (minimum $1), paypal (minimum $5), etc and the payment is based on day so no need to wait too long if you have good traffic. To see the examples of ads runing  click here

There are many other monetizing programs also here i have share my own experience choose the one that best suit you and start earning.
Read More

Monday, June 18, 2012

Transform the look of Samsung galaxy y s5360 to galaxy S III. Here i have collected the required things from different sources like xda , etc thanks to all the guys who made this possible i am just writing a tutorial how to transform the look of galaxy y to achive the look and feel of samsung galaxy SIII . Tutorial how to Change Icon , Wallpaper, Boot Animation,Video Player of Galaxy Y and achieve look of New Galaxy SIII on galaxy y .

So to achieve the look and feel of galaxy s3 to galaxy y s5360 we will have to add new icons, wallpaper boot animations etc that is provided below in this post first take look Icon pack Preview .

Screen Shot:

Step by step installation instructions along with required data:


  • First of all we will change the icon of galaxy y
  • For this you will have to download Galaxy Slll ICON PACK FROM HERE
  • Now we will have to flash the S3 ICON PACK.zip in recovery mode follow instruction below
  • Trun off your phone then start it by pressing volume up+home+power button.
  • Click on "update from sdcard" then select "S3 Icons Pack xen.zip" file then select reboot. Cong. first step over.
  • Second add galaxy S3 wallpaper to galaxy y.
  • For this you will have to download Galaxy Slll WALLPAPER PACK FROM HERE
  • very easy extract the zip file to sd card and set as wallpaper.
Next changing boot animation of galaxy y 

    changing boot animation of galaxy y
    how to change boot animation of galaxy y
  • You will have to download Galaxy Slll BOOT ANIMATION FROM HERE   .
  • you will have to flash CWM or Stock Recovery Mode with "Slll boot animation xen.zip"
  • Next install the S3 video player on galaxy y
  • For this you will have to download Galaxy Slll VIDEO PLAYER FROM HERE
  • Just install the Apk i hope you can do that easilyCongratulation now you have achieve look and feel of s3 on galaxy y. 
  • Download Galaxy SIII Ringtone from here it is a zip file containing six ring tone you will have to extract this file using file manager like Astro if using mobile or if on pc use winrar to extract it on sd card then play it in music player and set as ringtone
In case if you want to go back to the original look an feel of galaxy y follow the steps to retrieve back.
Download CWM from Link and Flash it.
Download stock icons Link
Now flash stock icons zip file.


Credit:
Thanks to Dev - explodeaamir@xda, ....... for few of this stuffs. Remind me if any mistake in the credit section through comment below and i will update this section.
    Read More

    Thursday, June 7, 2012

    TUTORIAL TO INSTALL MIUI ROM V2.0 ON SAMSUNG GALAXY Y.
    So here i am going to show you how to install  Miui Rom on samsung galaxy y. This is a modified rom.
    MIUI ROM V1.0 and V2.0 FOR GALAXY Y INSTALLATION TUTORIAL

    So first of all take a look on few screen shots of samsung galaxy y running Miui Rom
    MIUI ROM v1.0 and V2.0 FOR GALAXY Y    MIUI ROM v1.0 and V2.0 FOR GALAXY Y    MIUI ROM v1.0 and V2.0 FOR GALAXY Y

    MIUI ROM v1.0 and V2.0 FOR GALAXY Y   MIUI ROM v1.0 and V2.0 FOR GALAXY Y   MIUI ROM v1.0 and V2.0 FOR GALAXY Y 

    Features:
    • Fast, Stable 
    • Deodexed APKs; Reindexed 
    • Zipaligned; Batch Optimized 
    • Superuser Access; Busybox Support 
    • Supports Dartktremor's A2sd; Init.d scripts 
    • Compatible with V6 Supercharger 
    • Quick Settings; 14 Toggles by lidroid rom 
    • swype to remove notification 
    • new status bar like MIUI rom's 
    • QQlaucher as default 
    • new file browser 
    • new taskmanager 
    • new messager 
    • new dailer 
    • new contacts 
    • playstore 
    • new deskclock 
    • MIUI alaram,natification & UI sounds 
    • new lock screen 
    • new theme 
    • MIUI music player and more stuffs from MIUI rom
    Note: If you follow these steps properly, you will successfully install the ROM or else you wont. It may leads to Bricking your Phone or other security issues. I will not be Responsible for what happens to your phone. I personally tried this ROM. It worked fine for me.
    Downloads:
    • WeUi V1.0.0.zip - Link (Required)
    • WeUI v2.0.zip - Link (Required)
    Steps to Install:
    1. Backup your System using ClockworkMod - Link (Required)
    2. Download both files from above link
    3. Now copy both files to the SD Card. Do Not put it in any folder. It ain't work.
    4. Turn Off your Device and go to Recovery Mode By Pressing and Holding this Key CombinationVolume Up + Home Button + Power Button. 
    5. Once you entered into the Recovery Mode. You will see the Blue Color User Interface where you can't use Touchscreen. Instead use "Volume Up and Volume Down to move Up and Down". And "Home Button to Select". And "Power Button used to go Back"
    6. Once you entered into Recovery Mode. You should Wipe Data and Cache to make this ROM Work Properly. (Needed)
    7. After that select "Apply Update from SDCard" option and choose downloaded WeUI ROM which is "WeUi V1.0.0.zip"
    8. Once Patching was successful. You have to Reboot your Phone by select "Reboot System Now". For the first System Start-Up it will take much time to start. So be Patience.
    9. Now Reboot again to Recovery Mode and Select update of WeUI ROM which is "WeUI v2.0.zip"...
    10. Reboot! The ROM is successfully installed in your phone. So Play with it.
    Read More

    Tuesday, June 5, 2012

    Tutorial to install new Rom on galaxy fit GT s5670 to achieve features and look of Xperia Play. This update based on xperia play with better performance to play games.This is Cyanogenmod 7 (CM7) ROM which is further modified to make its look almost like Sony Xperia play Stock Mod and Scripts are added for better performance. So lets take look on the features of the Xperia gamers edition Rom for galaxy fit GT s5670.


    Features of gamers edition rom :-

    • Modified Kernel For Best Performance During Game Play.
    • Scripts Added For Performance Improvements
    • Original Boot Animation of Sony Xperia
    • New Drawer Animation.
    • Bareboned (100 MB).
    • TimeScape Resized to HDPI.
    • Removed DSP Manager.
    • Xperia Launcher from Stock ROM of Xperia X10 Mini.
    • Added xLOUD & Beats Audio.
    • more than 800 mhz processor.
    Steps for updating galaxy fit GT s5670:-
    • Before updating backup all your dates, files, contacts and sms.
    • We will not be responsible if you brick your phone try at your own risk.
    Requirements:-
    • galaxy fit mobile
    • Files
                1)     odin + ops file
                2)     xperia gamer’z edition rom.
                3)      google apps.

    Extract the odin + ops file on pc and choose below file:-

    • ops -beni_v1.0.ops
    • check on one package
    • one package -cwm5
    • Then put your phone in download mode by long pressing = volume down + home key + lock key together.
    • Connect your phone to your pc & hit the start button & wait until rebooting.
    • The put your phone in recovery mode by long pressing = home key + lock key & choose below files. use volume keys to move up or down and home key to choose. To get back press lock button.

    1. Choose data wipe – select yes wipe date
    2. Choose wipe cache – select yes wipe cache
    3. Choose zip from sd card and install ”Xperia gamer's edition”
    4. Choose zip from sd card and install ” Google apps”
    5. Choose data wipe – select yes wipe data.
    6. Choose reboot system and wait until reboot.
    7. It will takes 5 to 10 minutes and reboot.
    Downloads:

    Read More
    Related Posts Plugin for WordPress, Blogger...
    Google Google+