Thursday, January 31, 2013

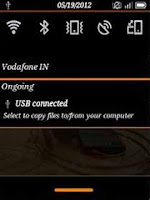
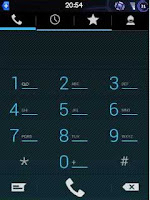
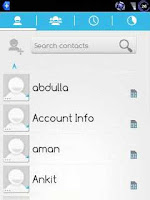
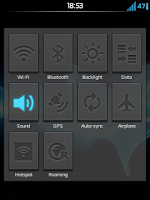
Hi friends as in our previous tutorial we have posted on how to install WEUI 2.0 custom Rom on your Galaxy y GT-s5360 Now the developer of this Custom amal das has shared it's updated version on XDA The Developer has share this Rom Along With Themes So here we are going to provide an installation instruction on how to install this latest version of custom Rom on your Galaxy y. But Before proceeding to the installation instruction Lets have look on Features and Screenshots (by Dev.) of WeUI 2.5 custom Rom running on Galaxy y.
WeUI v2.5 custom rom for galaxy y gt-s5360 along with theme

Screenshots:
        WeUI v2.5 custom rom for galaxy y gt-s5360 along with theme   
          WeUI v2.5 custom rom for galaxy y  Features

  • MIUI UI
  • MIUI Launcher ( modded )
  • MIUI Fonts
  • MIUI Default wallpapers
  • MIUI Locker
  • MIUI Alarms
  • MIUI Notifications
  • MIUI Ringtones
  • MIUI Boot Animation
  • MIUI Music Player
  • MIUI Camera
  • MIUI File Manager
  • MIUI Compass
  • MIUI Gallery
  • MIUI theme
  • MIUI4 Dialer
  • Notification Bar Themed to MIUI
  • MIUI Icons
  • Orange Overscroll Glow
  • play store
  • Stable and Very Fast
  • Stable and Very Fast
  • Many More features Cant List.
  • All these Features with a Stock Rom Touch.
Warning:
Use at your own Risk we will not be held Responsible for what happens to your phone.

Requirements:
A rooted Galaxy y model gt-s5360Rom file : WeUi V2.5.zip
Size:97.33 MB
Update file: patch weui v2.5.zip
Size:10.17 MB

Steps to Install ROM:
  • Backup your System using ClockworkMod - Link (Required)
  • Download both files from above link
  • Now copy both files to the SD Card. Do Not put it in any folder else it will not work.
  • Turn Off your Device and go to Recovery Mode By Pressing and Holding this Key Combination Volume Up + Home Button + Power Button. 
  • Once you entered into the Recovery Mode. You will see the Blue Color User Interface where you can't use Touchscreen. Instead use "Volume Up and Volume Down to move Up and Down". And "Home Button to Select". And "Power Button used to go Back"
  • Once you entered into Recovery Mode. You should Wipe Data and Cache to make this ROM Work Properly. (Needed)
  • After that select "Apply Update from SDCard" option and choose downloaded WeUI ROM which is "WeUi V2.5.zip"
  • Once Patching was successful. You have to Reboot your Phone by select "Reboot System Now". For the first System Start-Up it will take much time to start. So be Patience.
  • Now Reboot again to Recovery Mode and Select update of WeUI v2.5 ROM which is "patch weui v2.5.zip"...
  • Reboot! The ROM is successfully installed in your phone. So Play with it.

Steps to Install theme:
Once the Rom is installed now you can install theme of your choice there are four different theme
Install theme
  • Download the theme zip File of your choice from the list provided above
  • Place it in the root Directory of Sdcard Directly
  • Boot into recovery by pressing (Vol. Key Up + Home Key + Power Key)
  • Select Install Zip From SdCard
  • Choose the theme zip
  • Install
  • Reboot
Congratulation you have learned successfully how to install WeUI v2.5 custom Rom on galaxy y. If you notice any bug post it on the thread page so developer may fix on next update.
Read More
Hi friends here today we are going to provide you an installation instruction of installing latest version of custom Rom known as HoneyCream 4.1.1. As in our previous article's we posted how to install xtreme poison v1, xtreme poison v2 , XTREME POISON V3, xtreme poison v4( ALSO KNOWN AS HoneyComb Xperience) and xtreme poison v4 ( BEATS WITH SENSE 4.0 ) Rom on Samsung Galaxy y and now the developer kaustubh.rockstar member of XDA Released an updated version of this custom Rom known as HoneyCream 4.1.1 .This custom Rom is based on DXLF1. This version include many bug fix and added features still its a custom Rom and might contain some bugs but working great so lets take look on features and screenshot of HoneyCream 4.1.1 Rom (by dev.) Running on Samsung Galaxy y gt-s5360.
HoneyCream 4.1.1 Custom ROM For Galaxy Y

SCREENSHOTS:
        HoneyCream 4.1.1 Custom ROM For Galaxy Y    
         HoneyCream 4.1.1 Custom ROM For Galaxy Y   
FEATURES:
  • Very smooth and lightening fast
  • All bugs fixed from v2
  • Revamped new ui
  • All new boot animation with awesome graphics [credits to yash989]
  • DSP manager
  • Added new extended power menu
  • Honeycream themed ui
  • New revamped status bar and twlauncher with configuration support
  • Removed all bloatwares
  • Honeycomb Messages and UI
  • Honeycomb music.. menu settings...
  • Cyanmobile features
  • Msg boomer
  • Msg polyp
  • Font changer
  • Battery calibration
  • Device miscellaneous
  • Changelog
  • Cyanmobile settings
  • Many many tabs in settings
  • Honeycomb wallpaper pack
  • Phone
  • Honeycomb animation
  • ICS msg
  • Greeper
  • Honeycomb clock
  • White toggles
  • Build.prop tweaks-fast scrolling 
  • Smooth performance 
  • Tablet like feelings
  • Better image quality and many more

Warning:
Use at your own Risk! we will not be held responsible for any damage to the device.

Requirements:
A Rooted samsung galaxy Y running on Stock Rom DXLF1
Rom File: HoneyCreamv3-signed.zip
size: 121.78 MB
CWM: CWM.zip


Installation Instruction:
  • First of all backup your system and charge battery full.
  • Be on stock Rom Rom and root your phone. If already rooted, proceed to the next step.(How to root or unroot Galaxy Y- here).
  • Download the Rom file and cwm file and place in the root directory of your phone's sd card and turn your phone off.
  • Reboot in Recovery mode by pressing vol up+home+Power button together once you enter recovery mode touch screen become function-less so use volume up and down to move up and down, home button for selection and power as back button.
  • Now in recovery mode select "apply update from sdcard" and navigate to the root directory of sd card and select cwm file "cwm-madteam-galaxY.zip" this will take you to clockworkMod Recovery.
  • Now select "install zip from sd" and then choose zip from sdcard" From the directory select the Rom file "HoneyCreamv3-signed.zip" and select yes.
  • Let the process to be completed it may take 5 to 10 minutes after competition of flashing reboot your phone.
  • First boot may take longer then normal boot so keep passions.
  • A Tweaks package is also available flash as above download here
Congratulation! you have learn how to install HoneyCream 4.1.1 on Samsung Galaxy Y S5360. In case you notice bug post on thread page so developer may fix it.
To receive latest update from us like our  facebook page Techween
Read More

Sunday, January 27, 2013

Hyperion 8 Project 2013 Pre GM build custom ROM for galaxy y GT-s5360 released by a Recognized Contributor at XDA Forum know as CarlDeanCatabay. Before this we have already provided an instructional guide on how to install Hyperion 7 Golden Master Final custom ROM on Samsung galaxy y. As now the latest updated version of Hyperion custom Rom has been released by the developer of this Rom and it is considered as the fastest and smoothest ROM for Samsung Galaxy Young GT-S5360 yet it is Pre GM build With the gorgeous UI , fast and fluid performance, battery life is everything you’ll love about this new Hyperion custom Rom. This Rom has almost all the fix and tweaks that makes it fast and smooth. So here are few screenshot of Hyperion 8 Project 2013 Pre GM build Custom Rom Running on galaxy y.


Screenshots:
Hyperion 8 Custom ROM galaxy y  
FEATURES

BASIC FEATURES

  • De-Odexed
  • Zipaligned
  • Recompressed APKS
  • Optimized APK Images
  • Rooted
  • BusyBox and BusyBox run-parts support
  • Apps2SD enabled
COMMON FEATURES
  • 15 Toggle Notification Drawer
  • 6 Lockscreens from Gingerbread AOSP/CM with custom app starter and gesture unlock
  • Status bar Tweaks + TEAM battery bar
  • 4-way Reboot Options
  • Expanded Power Menu
UNIQUE FEATURES
  • No SMS Bug
  • No false Android version
  • No useless features
  • Least branding
ADVANCED FEATURES
  • EXT4 File System Support
  • CIFS
  • Swap Support
  • BaCeM Tweak
  • UnderVolt Support
  • Firewall Support (DroidWall Open-Source Project)
  • Ad-blocking host file
PLUS FEATURES
  • Supercharged Hyperion Core v2 with Adrenaline Engine v4.4
  • Transparent JellyBean user interface
  • Ear-gasmic sound quality
  • Integrated Autostart manager, Firewall and Network Unlocker
  • Modular system structure
  • System Replacer
EXPERIMENTAL FEATURES
  • Force GPU Rendering - Force use of GPU for 2D rendering
  • Disable HW overlays - Always use GPU for screen compositing
  • Allow purging of assets - Purging of bitmap memory assets allows freeing of more RAM when needed (you can now get as low as 85-90mb used RAM)
  • 32bit transparency - Better graphics performance and full transparency support

WARNING:
Use at your own risk! we will not be held responsible for any damage to your device.

Requirements:
A rooted samsung galaxy y
CWM :Cwm
Rom file:(not mirrored) HYPERION-8.PRE-GM.BUILD.02.zip
Size: 102.28 MB

Installation Instructions:

Flash Hyperion using STOCK RECOVERY
  • Go to recovery by pressing the HOME button + VOLUME UP key and the POWER BUTTON
  • Select WIPE DATA/FACTORY RESET
  • Select WIPE DATA/FACTORY RESET
  • Select APPLY UPDATE FROM SDCARD
  • After installing, reboot your phone
Flash Hyperion using CWM (ClockWorkMod) RECOVERY
  • Go to recovery by pressing the HOME button + VOLUME UP key and the POWER BUTTON
  • Select MOUNTS AND STORAGE
  • Mount /system
  • Mount /data
  • Mount /sdcard
  • Select WIPE DALVIK-CACHE from Advance and Debugging
  • Select WIPE BATTERY STATS from Advance and Debugging
  • Select WIPE DATA/FACTORY RESET
  • Select WIPE CACHE PARTITION
  • Select INSTALL ZIP FROM SD CARD
  • Select SELECT ZIP FROM SD CARD
  • After installing, press the power button to go back and select REBOOT SYSTEM NOW
Congratulation! you have learned how to install latest version of Hyperion 8 Project 2013 Pre GM build custom ROM on samsung galaxy y GT-s5360. In case you notice bug post on thread page so it that developer can fix it.
Read More
Temple Run 2 1.0.1 Apk Armv6 and armv7 devices.The addictive mega-hit Temple Run 2 is now available for Android including armv6 and armv7 so get ready to run.
Temple Run 2 v1.0.1 for Armv6
FEATURES
  • Beautiful new graphics
  • Gorgeous new organic environments
  • New obstacles
  • More powerups
  • More achievements
  • Special powers for each character
  • Bigger monkey
Requirement:
Android: 2.1 and Up

Screenshot:


Download:
TEMPLE RUN 2 APK (QVGA, HVGA, WVGA, Tablet)

Google play: Download

Instructions:
Install the apk and play.
Read More

Firefox os is a Mozilla's mobile operating system. The web browser Firefox maker Mozilla unveiled Keon and Peak smartphones with Firefox OS. This smartphones is developed by Mozilla in partnership with Spanish phone manufacturer Geeksphone and telecommunications provider Telefonica. Presently this phones are Developer preview hope to be available in February.

Mozilla smartphone Keon      Mozilla smartphone Peak
This two models Keon and Peak comes with different hardware specification where keon is featured with small 3.5-inch screen, 3 MP Camera, 1 GHz processor, 4 GB storage and 512 MB RAM, which can be considered as a low budget phone.The next is peak it is a better smartphone with good features like 4.3″ qHD IPS Multitouch screen, Dual-core 1.2GHz Snapdragon S4 processor, 8 MP rear camera and 2 MP front camera, 4 GB storage and 512 MB RAM.

Mozilla has not confirm the release date of this devices but hope to be released in February. But they have announced Firefox OS App Days which will be held in this week where developers can participate and learn about Firefox OS and developing its applications.

So, we may hope to soon have Mozilla's Firefox OS based phones in market along with Android, iOS,windows and Symbian based smartphones.
Read More

Thursday, January 24, 2013

Hi friends As we know that lots of Custom Rom are developed for Samsung Galaxy y this time we are going to provide you an installation instruction of a custom Rom which was ported  from Samsung Galaxy Y mini by the member of XDA forum percy215 for galaxy Y so all credits of developing this Rom Goes to him Here we are only going to provide installation instruction So don't forget to thanks him. So before proceeding to the installation Instruction have look on few screenshots and features of this Custom Rom (by Dev.) running on galaxy y.

SCREENSHOTS:
               New Experience v7.0 Custom Rom for Galaxy y  New Experience v7.0 Custom Rom for Galaxy y  
                 New Experience v7.0 Custom Rom for Galaxy y 

FEATURES:
Apparenceand Utility
  • Holo Launcher v2.0.1;
  • Android 4.2 System Icons of all applications;
  • ICS\JB System Themes (NO APK) framework and SystemUI png rearrangend by me;
  • New Jelly Bean Statusbar with brightness control, power widget under jb carrier, clock, date, settings and clear button, clickable notifications and closon;
  • New Jelly Bean - ICS Task Switcher style;
  • Fixed and resized DeskClock.apk app;
  • Text Apparence framework-fix (95%);
  • New Transitions Jelly Bean style);
  • Tablet Tweaks (softkey) enabled in a framework;
  • New default font roboto, full ics loock;
  • New ICS lockscreen;
  • New Resized Cyanogenmod 10 (Jelly Bean) Settings.apk;
  • New Cyanogenmod Wallpaper (New Experience Wallpaper) Mix (Jelly Bean 4.1 and 4.2, Ics, HoneyComb and other);
  • Gallery 3D replaced with full modded by me QuickPic [updated 2.7.1];
  • New Boot Sound;
  • Bootsound on\off patch by autoradio78;
  • Camerasound on\off patch by autoradio78;
  • Videosound on\off patch by autoradio78;
  • New Experience bootanimation logo and default wallpaper;
  • New tones from JB AOKP arrangement(only useful tones).
Performance
  • Adrenaline engine 4.4;
  • Build.prop new tweaks;
  • Dalvik set at 48m to default;
  • Compcache disabled;
  • 16 bit image to default;
  • Dithering disabled;
  • Scrolling cache disabled to default;
  • Xloud Sound with working DPS Manager for perfect sound;
  • BRAVIA Engine;
  • Ability to install unknown source applications at first boot;
  • Debug usb removed from statusbar notifactions;
  • Airplane mode active by default after first boot (for those without a data plan);
  • Pre-patched host file (adfree) for not have advertisemant in applications.
Applications
  • CM7 SMS/MMS App Improved (with bubbles) by lousou76 [fixed invisible recipients typing];
  • CyanMobile advanced Taskmanager;
  • SuperSu app and binary;
  • Gapps in build with latest Google Play Store 3.10.10;
  • Google Play Music;
  • Disabled Setup Wizard at first boot;
  • Deleted CM Update Notify;
  • Deleted CM Stats;
  • Deleted Protips;
  • Deleted Genie Widget;
  • New ICS digital clock;
  • Notepad;
  • Droid Wall;
  • CPU Temp Widget;
  • SGSII digital clock Widget ICS style by autoradio78;
  • Achep Timer and Stopwatch app.[/QUOTE]
Warning:
Use at your own Risk we will not be held responsible fore any damage to your Device.

Requirements:
A rooted Samsung Galaxy y with CM kernel Installed.
Rom file: (not mirrored) CM 7 New Experience.zip
Size: 85.06 MB
CWM: CWM.zip

Installation Instruction
  • First of all Backup your System and charge phones battery full.
  • If on stock Rom Root your Device and flash any CM kernel (just Google for best suited Kernel and install it)before proceeding.
  • Now Download the Rom file and cwm file and place in the root directory of your phone's sd card and turn your phone off.
  • Reboot in Recovery mode by pressing vol up+home+Power button together once you enter recovery mode touch screen become function-less so use volume up and down to move up and down, home button for selection and power as back button.
  • Now in recovery mode select "apply update from sdcard" and navigate to the root directory of sd card and select cwm file "cwm-galaxY.zip" this will take you to clockworkMod Recovery.
  • Now select "install zip from sd" and then choose zip from sdcard" From the directory select the Rom file "CM 7 New Experience.zip" and select yes.
  • Let the process to be completed it may take few minutes after competition of flashing reboot your phone.
  • First boot may take longer then normal boot so keep passions.

Congratulation! you have learn how to install CM 7 New Experience on Samsung Galaxy Y S5360. In case you notice bug post on thread page so developer may fix it.

To receive latest update from us like our  facebook page Techween
Read More

Tuesday, January 22, 2013

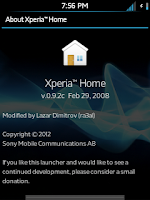
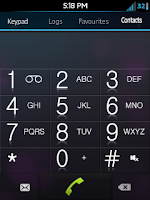
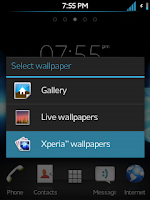
In our previous article we have posted an instructional guide on how to install Xperia NxT MoD v1.0, Xperia NxT MoD v1.5 and Xperia NxT MoD v1.7 theme pack for any device which runs Ginger Bread (GB) but now Xperia NxT MoD v2.0 is integrated with AROMA Installer so the steps will be a bit different and easier. Here as demo i am using Samsung galaxy y GT-s5360 an Android devices. Now the updated version of this mode pack has has been released and the new version is known as Xperia NxT MoD v2.0 this works in all Rom's. This MoD features all Xperia items like Mobile Bravia Engine, Icons, Widgets, Sounds, Wallpapers, etc. which are ported to other GingerBread devices. The developer of this mod pack is Ganesh Arivoli from Xda so don't forget to thanks him for his work although he did not include Timescape UI as many devices don't support it. But the developer have included many Xperia items that you would like. This MoD pack is only for rooted GingerBread 2.3+ running devices. So lets have look on few screenshots (by dev.) of Xperia NxT MoD v 2.0 running on Gingerbread running devices galaxy y.
Xperia NxT MoD v2.0
Screenshots:


Features:
  • Xperia Apps:
  • ▬ Xperia Home with Settings
    ▬ Track-ID
    ▬ Walkman Music Player
    ▬ Xperia S Wallpaper Picker
    ▬ Xperia MMS app
    ▬ Xperia Dialer
    ▬ Xperia Phone
  • Xperia S CM7 Theme (themed apps)
  • ▬ com_android_browser
    ▬ com_android_calculator2
    ▬ com_android_calendar
    ▬ com_android_camera
    ▬ com_android_contacts
    ▬ com_android_deskclock
    ▬ com_android_inputmethod_latin
    ▬ com_android_mms
    ▬ com_android_music
    ▬ com_android_phone
    ▬ com_android_settings
    ▬ com_android_systemui
    ▬ com_cooliris_media
    ▬ com_google_android_apps_genie_geniewidget
    ▬ com_android_providers_downloads_ui
    ▬ com_android_packageinstaller
    ▬ com_sonyericsson_home
  • Ori Thread : here
  • Xperia Widgets:
  • ▬ Clock Widgets (5 clocks)
    ▬ On Off Tools (11 widgets)
    ▬ Photo and Video Widget
    ▬ Weather Widget (2 widgets)
    ▬ Smart Contacts(3 widgets)
    ▬ NxT Clock Widget
    ▬ Digital Clock Wideget
  • Other:
  • ▬ Xperia S Fonts
    ▬ Cosmic Flow Live Wallpaper
    ▬ Widget Picker
    ▬ Mobile Bravia Engine
    ▬ Xperia T Boot Animation
    ▬ Xperia S Ringtones
    ▬ Xperia S Notification Sounds
Note : You may not get all widgets. It depends on your Launcher.
Use the provided Xperia Launcher which supports all widgets.


Warning:
Use at your own Risk! we will not held responsible for any damage to your device.


Requirements:
Cwm for Galaxy y model gt-s5360: cwm.zip
Xperia Mod Pack:(not mirrored) [AROMA] Xperia NxT MoD 2.zip
Size: 41.63 MB

Instructions :
  • Backup your system charge battery 50%.
  • Download cwm according to your device the above provided cwm file is for galaxy y so if you have other device just Google it and mod pack  and place in root directory of sd card and turn your phone off. 
  • Boot  your phone in recovery mode by pressing volume up+home+power button together.
  • When you enter recovery mode select apply update from sd card and navigate to root directory and select "CWM.zip"
  • As now you are in cwm mode select install update from sd card and Select the Mod file "[AROMA] Xperia NxT MoD 2.zip" and ok.
    AROMA Instructions:
    Use Next and Back tab to go to Next and previous screen.
  • Screen 1 theme selector:
  • There are five themes available Generic, ICS, MIUI, MIUI4 & Sense select any one according to your choice and next
  • Screen 2 Welcome Screen :
  • This page contains details about Xperia NxT MoD v2.0 you may read it and then next.
  • Screen 3 Agreement :
  • This page contain Agreement Read and Check the Xperia NxT MoD Agreement if you agree then can proceed to next step by selecting next.
  • Screen 4 Change log :
  • This page contain Change log of Xperia NxT MoD v2.0 in compare to its previous versions select next and proceed.
  • Screen 5 Installation Type :
  • This is the important step select the one that best fits your device and next.
  1. Default (For Samsung Galaxy Y) : Contains all the Xperia NxT MoD features.
  2. Minimalist (For Samsung Galaxy Y) : Excludes additional features like Xperia Home Launcher, Xperia Dialer, Xperia Mms apps. All other features included.
  3. FOR CM7 Roms (For All CM7 Roms) : Includes features which will work only on CM7. For Example, The Xperia S CM7 Theme.
  4. For Other Devices (For All Devices) : For Compatibility with All GingerBread Devices.
  • Screen 6 Reboot option: You may select Reboot after installation is completed and next.
  • Screen 7 Installation option: Let the installation to be completed succesfully and after installation completes select next
  • Now Reboot Device.
Congratulation! you have installed Xperia NxT MoD v2.0. In case noticed any bug post on thread page so that dev can fix on next update.

For CM7 Theme
Open Theme Chooser and select Xperia S Theme
Read More
In this world of high-speed technology, everyone seems to be smitten by the idea of fast and easy results. Unfortunately, reality is far from this. No matter what anyone has told you, business blogging doesn't give fast and easy results. You have to master the art of writing, understand the ever-changing facets of technology and keep pace with the interests of your audience. You have to regularly post blogs, upload related images and, not to mention, respond to reader’s questions. Hiring an assistant would make a lot of sense but if you are working on a shoe-string budget (like most of us) then these 5 core blogging essentials should help your business succeed.
Make your Blogging efforts Consistent:
One of the main aspects of business blogging is creating quality content and posting them regularly. The more blogs you post, the more traffic you’ll be able to generate. It’s a known fact that Google recognizes and recommends sites that have new and updated information on a regular basis. But before jumping into the wrong conclusion that by blogging regularly you’d be able to improve your site’s lead generation overnight, remember that it takes a lot of time and effort.
Make Friends with WordPress:
Make friends with WordPress, as it houses all your blog posts. WordPress comes out with a number of updated versions and it is important that you stay updated too. Make sure you don’t have any unauthorized blogs and empty fields. Make use of tags and keep checking the status of your dashboard. Your dashboard gives you a complete summary on the number of posts you currently have, the number of comments and the information on all those linking to you. These stats are there for a reason, so it’s better to make use of them.
Track Traffic Movements:
Keeping track of the number of people visiting your blog is the only way to know if your blogging efforts are bringing business. Some of the stats you should keep an eye on are page views, landing pages, the time spent on your site, number of visitors and referring sites. There are a number of analytic tools available for tracking traffic.
Retain Reader Interest and Engage with Them:
The main aim of business blogging is to connect with readers and syncing your blog content with the needs and problems of readers. Here, you might want to restrain using your sales pitch.  Readers are interested in learning and want to acquire quality information. When they get this, they’ll even reward you with their time and energy.
Design a Compelling Call to Action
This is where you should go beyond the mundane ‘Call us now’ line. Think of a compelling call to action, which will induce readers to divulge their personal information. Readers would be willing to give their details only when they know that there is something useful and valuable in it.
Yes, it is a tough job. With a business to maintain, you’ll have to find time for blogging. But once you start blogging, you’d find it simple, enjoyable and engaging.

Guest Author
Bylines Randy Collins likes writing articles related to Technology News, Gadget Reviews and How To. He also does guest posting for buycharter.com - a site that offers savings and current information on charter internet.
Read More

Wednesday, January 16, 2013

Hi Friends here we are going to provide you an instruction on how to Flash Samsung Galaxy Y with Stock Firmware using ODIN. So follow the instruction and successfully Flash Samsung Galaxy Y with ODIN.

Requirement:
A Galaxy y model gt-s5360.
A computer running on windows xp, vista or seven with proper USB driver installed to connect your phone to computer (Get USB Driver for Samsung Galaxy Y HERE )
Stock Rom file: Stock Rom ( S5360_DXLF2_OLBLG1_DXLF1_wipe_by_SplitFUS2.zip )
Size:120.5 MB
ODIN:Odin3-v1.85.zip

Instruction:

  • Charge your phone battery full.
  • First of all Download the required file ODIN AND Stock Rom file and place it in a folder on your desktop.
  • Now you have two files in your folder extract both with any file extractor.

  1. Odin3-v1.85.zip
  2. S5360_DXLF2_OLBLG1_DXLF1_wipe_by_SplitFUS2.zip (file which contains the stock rom i.e 2.3.6 )

  • Now turn your Samsung Galaxy Y off ( Remove the battery for few seconds and insert it back)
  • Press Volume down + Home + Power to boot in Download Mode see video below.
  • Now you enter Download mode select continue by pressing Volume up button.
  • Now connect your phone to computer via USB cable.
  • Now on computer open Odin3 v1.85.exe
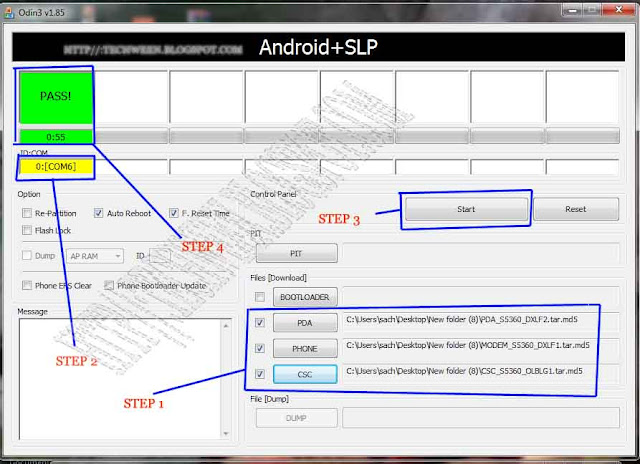
  • Now extract Stock Rom file inside you will get three files PDA_S5360_DXLF2.tar, MODEM_S5360_DXLF1.tar and CSC_S5360_OLBLG1.tar
  • Now in File[download] section of ODIN Browse the 3 tar files accordingly
  1. PDA=PDA_S5360_DXLF2.tar
  2. PHONE=MODEM_S5360_DXLF1.tar
  3. CSC=CSC_S5360_OLBLG1.tar
  • PIT and BOOTLOADER files not required - leave it blank.
  • Leave all other fields and check boxes default as shown in picture below.
  • Now make sure you are getting yellow box in ID:COM (this means that your device is now connected and detected by odin)
  • Now click on start.
  • Now let ODIN do its work and wait till you see PASS in green colour it mean the flashing process is complete successfully. Samsung Galaxy Y will auto reboot.

Congratulation you have learned how to Flash Samsung Galaxy Y with Stock Firmware using ODIN. Source xda


Read More

Tuesday, January 15, 2013

Alien vs predator theme and icon pack for USSR v9 Custom Rom. As we have already posted an instructional Guide on how to install USSR v9 Custom Rom on Galaxy y now here is a theme and icon pack for this custom Rom. This pack is created and shared on XDA by the member Chronique so thanks him if you like his work. So here are few screenshot of ussr v9 custom Rom running on galaxy y loaded with Alien vs predator theme pack.

Screenshots:
                   
                  
Warning:

Use at your own Risk!

Requirements:
A galaxy y running on USSR v9 Custom Rom
Theme pack: AVP-theme-by-rame-rame.zip
Size: 11.92 MB
Icon pack: Icon avp.zip
Size: 1.23 MB
CWM: cwm

Installation Instruction:
  • First of all backup your Device and must be running on USSR v9 Custom Rom.
  • Download and place all the three files CWM.zip, AVP-theme-by-rame-rame.zip and Icon avp.zip in the root directory of yours phone sd card and turn off your phone.
  • Now reboot in Recovery mode by pressing Volume up + Menu + power button together.
  • When you enter recovery mode touchscreen will become function less so use volume up and down to move up and down menu as selection and power button as back.
  • Now from recovery mode menu select " Apply update from sdcard" and select clockworkmod recovery file "CWM.zip" after you enter CWM Recovery 
  • Then in recovery mode select Install zip From SDcard. 
  • Then select Choose Zip from SDCARD navigate to root directory and select the theme pack "AVP-theme-by-rame-rame.zip" file then wait for the installation to be completed.
  • Again select Choose Zip from SDCARD navigate to root directory and select the icon pack "Icon avp.zip" file then wait for the installation to be completed.
  • After installation completes Reboot your phone.
Congratulation! you have installed Alien vs predator theme and icon pack on ultimate supersonic rom v9 code-name JellyNoid running on your Samsung galaxy y if you notice any bug then you can go to the thread page and provide details so that developer will fix it.
Read More
Related Posts Plugin for WordPress, Blogger...
Google Google+