Friday, July 27, 2012

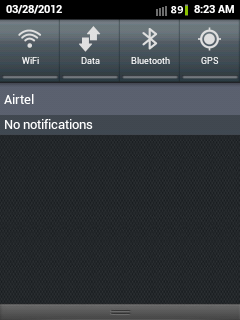
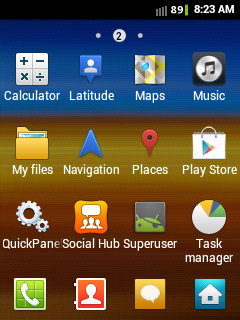
Tutorial to root and unroot samsung galaxy y duos S6102. This tutorial is for the user who have to root samsung galaxy y duos s6102 and not for samsung galaxy y s5360 if you want to root galaxy y s5360 then click here for tutorial. Thanks to Millan.SIS at xda for creating this package here i am only providing tutorial on how to use it. Get custom Rom for galaxy y duos


Warning: Rooting will void warranty of your phone use at your own risk.

Steps to Root Galaxy Y Duos S6102

  • Must backup your data first
  • Download the Rooting File from Here (update.zip) also availavle on xda
  • Copy update.zip file to the SD Card root directory
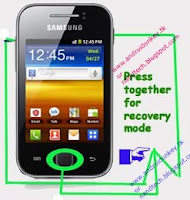
  • Turn Off your Device and boot in recovery mode by pressing the key Volume Up + Home Button + Power Button together. 
  • when your phone boots in recovery mode will see the Blue Color UI where you can't use Touchscreen. Instead use "Volume Up and Volume Down to move Up and Down". And "Home Button to Select". And "Power Button used to go Back"
  • Then select "Apply Update from SDCard" option and choose "update.zip". from sd card
  • Once Patching is completed successfully reboot your Phone by select "Reboot System Now".
  • If you find "SuperUser" in your app menu your phone successfully Rooted 

Steps to UnRoot Samsung Galaxy Y Duos s6102


If you want to unroot your phone then
Backup your data
Download the UnRooting File from here (unroot.zip)
Follow rest of the steps as above in root section
If you cant find "SuperUser" in your app menu your phone successfully UnRooted.
Read More

Saturday, July 7, 2012

As many of my visitors requested me how to restore back to stock Rom So here is a simple way to get back to stock rom for galaxy y using ClockworkMod. When flashing rom with this method you don't need an Odin and Computer. It is very useful for those who always use to updated their phone with new versions of Custom Rom.

Warnings:
Charge your's phone battery full before applying this instruction
Use this at your own risk we will not be held responsible for what ever happens to your phone using this guide.


Requirements:
Stock ROM file (ClockworkMod.zip) (124.82 MB) 


Flashing Instructions: 
  • Download the zip file from the link above to root directory of sd card and extract it using zipper. On extraction you will get one folder and two files.
  • Now open the folder it name will be "backup", Inside the backup folder you will get " DDLE1" Folder this folder con taints Nandroid.rsf.tar, System.rfs.tar, Cache.rfs.tar 
  • Now reebot your phone in ClockworkMod Recovery and Wipe data and cache partition. 
  • Now from the menu select "Backup and restore". And select Restore (not advanced restore) 
  • Then Select the folder DDLE1 and after that confirm-restore DDLE1. 
  • Flashing will start do not intterupt the process it may take up to 10 minutes
  • When you receive the message Restore complete,reboot your device. 
  • Phone will restart.

YOU ARE BACK ON STOCK ROM.
Read More

Wednesday, June 20, 2012

Google Adsense is not only a way to monetize blog or site there are other alternatives
Few best alternatives to Google AdSense to earn money for your content on blog or site. Google Adsense is not only a way to monetize blog or site there are other alternatives. As a blogger or website owner you know that Google AdSense is #1 contextual advertising network. There are lots of bloggers who are making hundreds of dollars from from Google but not all because as a new blogger or site owner may neglect some AdSense ToS unknowingly and then it will become very difficult for them to get approved from Google AdSense and even after getting approval if Adsense ToS are neglect will get banned by Google from the Adsense. So what to do if don't have an approved AdSense account or get banned for neglecting Tos of Google AdSense. Now the question arises how to monetize the blog the best answer is to look for Adsense alternatives.

So here i am going to list few adsense alternatives which you can use to monetize your blog (based on my own experience and a few points from other)

chitika is one of the most popular advertisement network and a nice alternative to adsense offer text, map, mobile ads in different size according to need of you space available Payment: Minimum payout of $10 is offers through PayPal and for Check $50.
Adbrite: 
Adbrite Adsense alternatives
Adbrite is one of the most popular advertisement network can be considered as the best alternative to Google AdSense. Adbrite have three different types of provision for displaying ads on your site Banner and or Text Ads, Full page ads and Inline ads some are CPM and some are CPC. The terms and conditions of Adbrite are much more relaxed but presently they are not accepting blog or site if it is hosted on free web hosting service or if not on top level Domain etc. payments are made through check.

BidVertiser:

Bidvertiser is also a good alternative to Adsense Bidvertiser have Different types of ads formate you can use there Banner and or text ads in your blog or website they have XML Feed and Mobile Banner ads for mobile version of your blog or site . Bidvertiser allow you to manage the and placement & style of ads with greater versatility Best for high traffic blogs. Payment: Minimum payout of $10 is offers through PayPal and Skrill/MoneyBookers, for Check $100 Minimum and for Wire $500 is Minimum.

Infolinks:
Adsense alternatives infolinks
Infolinks are specialized in In-Text advertising their ads are shown on your page along with words based on the keywords and phrases on your page which does not contain any link are converted to advertising links.Different ads type they have are In-Text, Related Tags, Tage Cloud and Search Widgets Their ads are Pay per Click Best thing is that you can use infolink ads with other advertising program.Payment: They pay you either by Wire transfer($400 min), echeck, payoneer or paypal ($50 min).

cpm.biz

Well this is just new and and i have just now registered it looks good lets see i will discuss about it latter.Payment: They pay you either by Alertpay (minimum $1), paypal (minimum $5), etc and the payment is based on day so no need to wait too long if you have good traffic. To see the examples of ads runing  click here

There are many other monetizing programs also here i have share my own experience choose the one that best suit you and start earning.
Read More

Monday, June 18, 2012

Transform the look of Samsung galaxy y s5360 to galaxy S III. Here i have collected the required things from different sources like xda , etc thanks to all the guys who made this possible i am just writing a tutorial how to transform the look of galaxy y to achive the look and feel of samsung galaxy SIII . Tutorial how to Change Icon , Wallpaper, Boot Animation,Video Player of Galaxy Y and achieve look of New Galaxy SIII on galaxy y .

So to achieve the look and feel of galaxy s3 to galaxy y s5360 we will have to add new icons, wallpaper boot animations etc that is provided below in this post first take look Icon pack Preview .

Screen Shot:

Step by step installation instructions along with required data:


  • First of all we will change the icon of galaxy y
  • For this you will have to download Galaxy Slll ICON PACK FROM HERE
  • Now we will have to flash the S3 ICON PACK.zip in recovery mode follow instruction below
  • Trun off your phone then start it by pressing volume up+home+power button.
  • Click on "update from sdcard" then select "S3 Icons Pack xen.zip" file then select reboot. Cong. first step over.
  • Second add galaxy S3 wallpaper to galaxy y.
  • For this you will have to download Galaxy Slll WALLPAPER PACK FROM HERE
  • very easy extract the zip file to sd card and set as wallpaper.
Next changing boot animation of galaxy y 

    changing boot animation of galaxy y
    how to change boot animation of galaxy y
  • You will have to download Galaxy Slll BOOT ANIMATION FROM HERE   .
  • you will have to flash CWM or Stock Recovery Mode with "Slll boot animation xen.zip"
  • Next install the S3 video player on galaxy y
  • For this you will have to download Galaxy Slll VIDEO PLAYER FROM HERE
  • Just install the Apk i hope you can do that easilyCongratulation now you have achieve look and feel of s3 on galaxy y. 
  • Download Galaxy SIII Ringtone from here it is a zip file containing six ring tone you will have to extract this file using file manager like Astro if using mobile or if on pc use winrar to extract it on sd card then play it in music player and set as ringtone
In case if you want to go back to the original look an feel of galaxy y follow the steps to retrieve back.
Download CWM from Link and Flash it.
Download stock icons Link
Now flash stock icons zip file.


Credit:
Thanks to Dev - explodeaamir@xda, ....... for few of this stuffs. Remind me if any mistake in the credit section through comment below and i will update this section.
    Read More

    Thursday, June 7, 2012

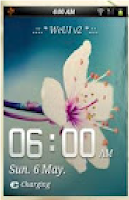
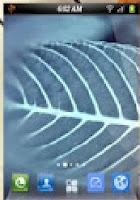
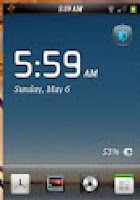
    TUTORIAL TO INSTALL MIUI ROM V2.0 ON SAMSUNG GALAXY Y.
    So here i am going to show you how to install  Miui Rom on samsung galaxy y. This is a modified rom.
    MIUI ROM V1.0 and V2.0 FOR GALAXY Y INSTALLATION TUTORIAL

    So first of all take a look on few screen shots of samsung galaxy y running Miui Rom
    MIUI ROM v1.0 and V2.0 FOR GALAXY Y    MIUI ROM v1.0 and V2.0 FOR GALAXY Y    MIUI ROM v1.0 and V2.0 FOR GALAXY Y

    MIUI ROM v1.0 and V2.0 FOR GALAXY Y   MIUI ROM v1.0 and V2.0 FOR GALAXY Y   MIUI ROM v1.0 and V2.0 FOR GALAXY Y 

    Features:
    • Fast, Stable 
    • Deodexed APKs; Reindexed 
    • Zipaligned; Batch Optimized 
    • Superuser Access; Busybox Support 
    • Supports Dartktremor's A2sd; Init.d scripts 
    • Compatible with V6 Supercharger 
    • Quick Settings; 14 Toggles by lidroid rom 
    • swype to remove notification 
    • new status bar like MIUI rom's 
    • QQlaucher as default 
    • new file browser 
    • new taskmanager 
    • new messager 
    • new dailer 
    • new contacts 
    • playstore 
    • new deskclock 
    • MIUI alaram,natification & UI sounds 
    • new lock screen 
    • new theme 
    • MIUI music player and more stuffs from MIUI rom
    Note: If you follow these steps properly, you will successfully install the ROM or else you wont. It may leads to Bricking your Phone or other security issues. I will not be Responsible for what happens to your phone. I personally tried this ROM. It worked fine for me.
    Downloads:
    • WeUi V1.0.0.zip - Link (Required)
    • WeUI v2.0.zip - Link (Required)
    Steps to Install:
    1. Backup your System using ClockworkMod - Link (Required)
    2. Download both files from above link
    3. Now copy both files to the SD Card. Do Not put it in any folder. It ain't work.
    4. Turn Off your Device and go to Recovery Mode By Pressing and Holding this Key CombinationVolume Up + Home Button + Power Button. 
    5. Once you entered into the Recovery Mode. You will see the Blue Color User Interface where you can't use Touchscreen. Instead use "Volume Up and Volume Down to move Up and Down". And "Home Button to Select". And "Power Button used to go Back"
    6. Once you entered into Recovery Mode. You should Wipe Data and Cache to make this ROM Work Properly. (Needed)
    7. After that select "Apply Update from SDCard" option and choose downloaded WeUI ROM which is "WeUi V1.0.0.zip"
    8. Once Patching was successful. You have to Reboot your Phone by select "Reboot System Now". For the first System Start-Up it will take much time to start. So be Patience.
    9. Now Reboot again to Recovery Mode and Select update of WeUI ROM which is "WeUI v2.0.zip"...
    10. Reboot! The ROM is successfully installed in your phone. So Play with it.
    Read More

    Tuesday, June 5, 2012

    Tutorial to install new Rom on galaxy fit GT s5670 to achieve features and look of Xperia Play. This update based on xperia play with better performance to play games.This is Cyanogenmod 7 (CM7) ROM which is further modified to make its look almost like Sony Xperia play Stock Mod and Scripts are added for better performance. So lets take look on the features of the Xperia gamers edition Rom for galaxy fit GT s5670.


    Features of gamers edition rom :-

    • Modified Kernel For Best Performance During Game Play.
    • Scripts Added For Performance Improvements
    • Original Boot Animation of Sony Xperia
    • New Drawer Animation.
    • Bareboned (100 MB).
    • TimeScape Resized to HDPI.
    • Removed DSP Manager.
    • Xperia Launcher from Stock ROM of Xperia X10 Mini.
    • Added xLOUD & Beats Audio.
    • more than 800 mhz processor.
    Steps for updating galaxy fit GT s5670:-
    • Before updating backup all your dates, files, contacts and sms.
    • We will not be responsible if you brick your phone try at your own risk.
    Requirements:-
    • galaxy fit mobile
    • Files
                1)     odin + ops file
                2)     xperia gamer’z edition rom.
                3)      google apps.

    Extract the odin + ops file on pc and choose below file:-

    • ops -beni_v1.0.ops
    • check on one package
    • one package -cwm5
    • Then put your phone in download mode by long pressing = volume down + home key + lock key together.
    • Connect your phone to your pc & hit the start button & wait until rebooting.
    • The put your phone in recovery mode by long pressing = home key + lock key & choose below files. use volume keys to move up or down and home key to choose. To get back press lock button.

    1. Choose data wipe – select yes wipe date
    2. Choose wipe cache – select yes wipe cache
    3. Choose zip from sd card and install ”Xperia gamer's edition”
    4. Choose zip from sd card and install ” Google apps”
    5. Choose data wipe – select yes wipe data.
    6. Choose reboot system and wait until reboot.
    7. It will takes 5 to 10 minutes and reboot.
    Downloads:

    Read More

    Wednesday, May 2, 2012

    Tutorial how to hard reset or restore back an android phone Samsung galaxy y to factory default settings. Hard reset is useful if your phone has issues like freezing, hang, slow or unresponsive. Some time this problems can be sorted out just by powering off your phone and removing the battery for few seconds and then putting it back again and power on your phone and every thing is fine but in some case if you are experiencing the same problem then hard reset will solve the problem.
    Hard reset your android phone, www.androidonkey.tk
    Instructions to hard reset:
    Before restoring your phone to factory default settings it is necessary to take backup of your phone because you will lose all your data. To reset your android phone just dial *2767*3855# , this will reset ypuor phone to factory deafult settings and reboot it.But in some case the code may not be helpful suppose your phone is hang or frozen and you cannot use the keypad or your phone hangs at log-on screen or lock pattern  then what to so just remove the battery from your phone  and put it back then press Volume up + Home +power button together this will take your phone to Recovery mode here touch screen of your phone will become function-less so use the volume key to move up and down and home key as select button. As you are now in recovery mode you will see a menu using volume key move to Wipe data/factory reset and then select it using home key this will reset your phone to factory default setting and reboot it.
    Read More

    Sunday, April 29, 2012

    Angry Birds is one of the most popular game for mobile phones there are lots to version of angry bird like Angry bird, Angry Birds Seasons, Angry Birds Rio, etc but recently the team has lunched its new version known as Angry Birds Space.
    Angry bird space, www.androidonkey.tk
    Description:
    In this game After their eggs got kidnapped by a giant claw the Angry Birds begin to chase it into a wormhole and find themselves in a new galaxy surrounded by pigs Luckily the Birds have super powers of their own. Angry Birds Space features 60 interstellar levels on planets and in zero gravity, resulting in spectacular gameplay ranging from slow-motion puzzles to lightspeed destruction. With brand new birds, brand new superpowers, and a whole galaxy to explore, the sky is no longer the limit
    ScreenShot:
    Angry bird space, www.androidonkey.tk Angry bird space, www.androidonkey.tk
    Download:
    LINK
    Read More
    Tutorial how to prevent others from accessing your personal videos, pictures  files on android phone. In simple words hiding your contents on android phone so that no one with out your permission can access your personal files even if he have your phone. So for doing this we will need a file manager called hide it pro it is a free application.
    hide videos on android phone, hide it pro, www.androidonkey.tk
    Description:
    With Hide it Pro you can hide pictures and videos files that you don’t want others to see. It has built in gallery, video player, password protection and etc. It is disguised as Audio manager application in the App Drawer through which you can control music on your android phone. Users have different folder to hide or unhide files. it comes with encryption tool to secure your hidden files and folders. It also have built in full featured file manager with ability to move/hide /delete /share multiple files at a time.
    How to install and use it:
    First of all Download it from google play click here and install it. When installation is over run the app it will take you to the lock-screen you will need to select your Password or pin code from 0 to 9 and enter the same when you log-in. you can choose either pin based lock-screen or Password based lock-screen is up to you. The next step is to provide recovery email id required in case you forgot your password or pin code.Now you will be automatically redirected to audio manager. now when you open the app it will ask you to provide the password or pin to unlock the application. on entering the correct password you will be on home screen of the app where you can hide pictures in picture folder videos in video folder and audio in audio folder or any things else like app lock or hiding message. to hide applications root access may be required.
    Read More

    Friday, April 27, 2012

    Tutorial how to add watermark to the pictures online after uploading to the bloggers blog. As suppose you have written a post and uploaded a picture in your post and published your post, but you have forgotten to add watermark to your picture now if you want to add watermark to your picture either you have to add watermark to your picture using any picture editor then re edit your post remove the previous picture and upload the picture with watermark and republish your post.But what i am going to say is that add watermark to already uploaded pictures on your blog post that have been already published.
    watermark to pictures already uploded to blog

    Simple steps are below just follow:
    • Log in to Google account.
    • From the top menu at Google.com click on more and select photos.
    • Now select Albums from the tab
    • Now select the album in which u have the photo to which you want to add watermark.
    • Use chrome for best result select the photo and click it.
    • On the upper left side click on creative kit it will take 5 to 10 min. depending on your net speed.
    • Now click on text tab it will take again few min.
    • Now enter the words or sentence that you want to appear on picture select, font, select font size, adjust position, set color of your choice,etc
    • After you are satisfied with customization  click on save a confirmation box appear click on replace.
    All done........
    Read More
    Tutorial how to install creed's Rom v2.5 on galaxy y. As we have already written a post on how to install creed's Rom version 2.0 on samsung galaxy y so today i am going to provide it update tutorial here the original credit goes to Xda dev for devloping this rom (Note it is a custom rom) and here i am on just writing the tutorial to install it.

    SCREEN SHOT:


    Features:
    • Adb/Hard Root - Access to Android Commander
    • Soft Root- SU
    • Pre Deodexed
    • ZipAligned
    • Maps With WorldWide Navigation
    • Bloatware Removed
    • BusyBox Support
    • Message App: 
    -No Auto Sms To Mms Conversion
    -No Receipient Limit
    -Built In 5 Theme
    • Touchwiz App(Samsung Home) : 
    -Transparency Level Increased
    -Alphabetical Auto Arrange
    -Landscape Orientation Intoduced
    • Auto Brightness Option in Display 
    • Boot Animation Enabled
    • Custom Boot Animation Added
    • Custom Power On Sound
    • Reduces Startup Time ~Less Than 13 seconds
    • 14 Status Bar Toggles 
    All 5 From Samsung(Wifi,B/T,Soung,GPS,Orientation)
    Data
    Lockscreen-Off
    FlashLight
    Shut Down Options
    Reboot,Recovery & Download modes
    Airplane Mode
    Brightness
    Auto Synchronise
    Screen Timeout
    (Note: Select Your Toggles and their order from Menu>Quick Panel Settings App)
    • Swipe To Remove Notification 
    • ICS Circle Lock (from stock)
    • More Bloatwares Removed
    • 20mb less size that before

    Known Bugs
    • Keyboard - Use 3rd Party Keyboard for overcome this bug....
    DOWNLOAD
                             Rom link

    INSTRUCTIONS

    • First of all make backup your phone
    • Then download Creed's ROM V2.5 the link provided below
    • Now copy the downloaded fine file to the root directory of SD Card.
    • Turn Off your Device and go to Recovery Mode By Pressing Volume Up + Home Button + Power Button together.
    •  In Recovery Mode you can't use Touchscreen. Instead use Volume Up and Volume Down to move Up and Down. Use Home Button to Select.
    •  Once you entered into Recovery Mode first of all Wipe your Phone.
    • After that select Apply Update from SDCard option and choose "Creed's_Rom_v2.5.zip".
    • Once Patching was done Reboot your Phone by select Reboot System Now
    • For the first System Start-Up it will take much time to start.
    • The Creed's ROM is successfully installed in your phone

    Read More
    Related Posts Plugin for WordPress, Blogger...
    Google Google+