Sunday, April 29, 2012

Angry Birds is one of the most popular game for mobile phones there are lots to version of angry bird like Angry bird, Angry Birds Seasons, Angry Birds Rio, etc but recently the team has lunched its new version known as Angry Birds Space.
Angry bird space, www.androidonkey.tk
Description:
In this game After their eggs got kidnapped by a giant claw the Angry Birds begin to chase it into a wormhole and find themselves in a new galaxy surrounded by pigs Luckily the Birds have super powers of their own. Angry Birds Space features 60 interstellar levels on planets and in zero gravity, resulting in spectacular gameplay ranging from slow-motion puzzles to lightspeed destruction. With brand new birds, brand new superpowers, and a whole galaxy to explore, the sky is no longer the limit
ScreenShot:
Angry bird space, www.androidonkey.tk Angry bird space, www.androidonkey.tk
Download:
LINK
Read More
Tutorial how to prevent others from accessing your personal videos, pictures  files on android phone. In simple words hiding your contents on android phone so that no one with out your permission can access your personal files even if he have your phone. So for doing this we will need a file manager called hide it pro it is a free application.
hide videos on android phone, hide it pro, www.androidonkey.tk
Description:
With Hide it Pro you can hide pictures and videos files that you don’t want others to see. It has built in gallery, video player, password protection and etc. It is disguised as Audio manager application in the App Drawer through which you can control music on your android phone. Users have different folder to hide or unhide files. it comes with encryption tool to secure your hidden files and folders. It also have built in full featured file manager with ability to move/hide /delete /share multiple files at a time.
How to install and use it:
First of all Download it from google play click here and install it. When installation is over run the app it will take you to the lock-screen you will need to select your Password or pin code from 0 to 9 and enter the same when you log-in. you can choose either pin based lock-screen or Password based lock-screen is up to you. The next step is to provide recovery email id required in case you forgot your password or pin code.Now you will be automatically redirected to audio manager. now when you open the app it will ask you to provide the password or pin to unlock the application. on entering the correct password you will be on home screen of the app where you can hide pictures in picture folder videos in video folder and audio in audio folder or any things else like app lock or hiding message. to hide applications root access may be required.
Read More

Friday, April 27, 2012

Tutorial how to add watermark to the pictures online after uploading to the bloggers blog. As suppose you have written a post and uploaded a picture in your post and published your post, but you have forgotten to add watermark to your picture now if you want to add watermark to your picture either you have to add watermark to your picture using any picture editor then re edit your post remove the previous picture and upload the picture with watermark and republish your post.But what i am going to say is that add watermark to already uploaded pictures on your blog post that have been already published.
watermark to pictures already uploded to blog

Simple steps are below just follow:
  • Log in to Google account.
  • From the top menu at Google.com click on more and select photos.
  • Now select Albums from the tab
  • Now select the album in which u have the photo to which you want to add watermark.
  • Use chrome for best result select the photo and click it.
  • On the upper left side click on creative kit it will take 5 to 10 min. depending on your net speed.
  • Now click on text tab it will take again few min.
  • Now enter the words or sentence that you want to appear on picture select, font, select font size, adjust position, set color of your choice,etc
  • After you are satisfied with customization  click on save a confirmation box appear click on replace.
All done........
Read More
Tutorial how to install creed's Rom v2.5 on galaxy y. As we have already written a post on how to install creed's Rom version 2.0 on samsung galaxy y so today i am going to provide it update tutorial here the original credit goes to Xda dev for devloping this rom (Note it is a custom rom) and here i am on just writing the tutorial to install it.

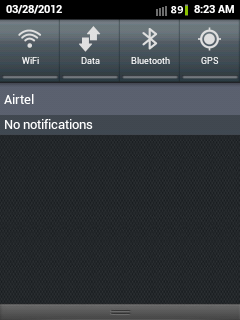
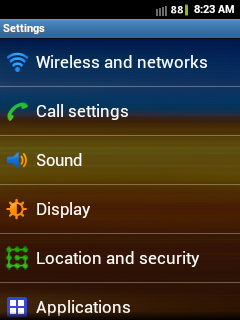
SCREEN SHOT:


Features:
  • Adb/Hard Root - Access to Android Commander
  • Soft Root- SU
  • Pre Deodexed
  • ZipAligned
  • Maps With WorldWide Navigation
  • Bloatware Removed
  • BusyBox Support
  • Message App: 
-No Auto Sms To Mms Conversion
-No Receipient Limit
-Built In 5 Theme
  • Touchwiz App(Samsung Home) : 
-Transparency Level Increased
-Alphabetical Auto Arrange
-Landscape Orientation Intoduced
  • Auto Brightness Option in Display 
  • Boot Animation Enabled
  • Custom Boot Animation Added
  • Custom Power On Sound
  • Reduces Startup Time ~Less Than 13 seconds
  • 14 Status Bar Toggles 
All 5 From Samsung(Wifi,B/T,Soung,GPS,Orientation)
Data
Lockscreen-Off
FlashLight
Shut Down Options
Reboot,Recovery & Download modes
Airplane Mode
Brightness
Auto Synchronise
Screen Timeout
(Note: Select Your Toggles and their order from Menu>Quick Panel Settings App)
  • Swipe To Remove Notification 
  • ICS Circle Lock (from stock)
  • More Bloatwares Removed
  • 20mb less size that before

Known Bugs
  • Keyboard - Use 3rd Party Keyboard for overcome this bug....
DOWNLOAD
                         Rom link

INSTRUCTIONS

  • First of all make backup your phone
  • Then download Creed's ROM V2.5 the link provided below
  • Now copy the downloaded fine file to the root directory of SD Card.
  • Turn Off your Device and go to Recovery Mode By Pressing Volume Up + Home Button + Power Button together.
  •  In Recovery Mode you can't use Touchscreen. Instead use Volume Up and Volume Down to move Up and Down. Use Home Button to Select.
  •  Once you entered into Recovery Mode first of all Wipe your Phone.
  • After that select Apply Update from SDCard option and choose "Creed's_Rom_v2.5.zip".
  • Once Patching was done Reboot your Phone by select Reboot System Now
  • For the first System Start-Up it will take much time to start.
  • The Creed's ROM is successfully installed in your phone

Read More
Related Posts Plugin for WordPress, Blogger...
Google Google+